

Last Updated: November 17, 2026
Quick Summary
To design professional mailing envelopes, start by measuring your contents and choosing the correct envelope size, such as the 10 for letters folded in thirds. Then set your document to the exact trim size, add bleed and safe margins, place the return address and recipient address within the safe area, and export a print-ready file.
- The 10 envelope measures 4-1/8" x 9-1/2" and fits 8-1/2" x 11" sheets folded in thirds.
- Set the document to the exact envelope trim size, not the press sheet, before placing elements.
- Place the return address block first because it anchors the layout.
- Keep the recipient address block free of graphics, borders, and background color.
- Place raster images at roughly 300 ppi at final size for print.
Table of Contents
- Start With the Right Envelope Size for Your Mailing
- Choosing an Envelope Design Template or Starting From a Blank Canvas
- Custom Business Envelopes With Logo: Branding That Gets Noticed
- Business Envelope Layout: Return Address, Recipient Address, and Logo Placement
- Envelope Printing Specifications: Paper Stock, Finish, and Print-Ready Files
- Window Envelopes, Security Features, and Postal Compliance
- Order Your Custom Envelopes From Atlantic Envelope
- Frequently Asked Questions
Start With the Right Envelope Size for Your Mailing
Professional mailing envelopes begin with one decision that shapes everything else: the size of your mailing envelopes. Get it wrong and contents won't fold cleanly, postage may not apply, and the piece arrives looking improvised.
At Atlantic Envelope, we've supplied printed envelopes to offices, event planners, and home-based businesses since 1982, and the first question is always: what am I putting inside?
The answer determines your format. A standard business letter folds in thirds and fits a #10. A proposal that must arrive flat needs a booklet envelope opening on the long edge.
Start by measuring your contents, not by picking a design.
Matching Envelope Size to Contents and Purpose
The #10 envelope is the workhorse of business mail: 4-1/8" x 9-1/2", built for 8-1/2" x 11" sheets folded in thirds. Invoices, statements, letters, and checks all travel in it comfortably. If you're mailing at volume, this is almost certainly your format.
Here's how the common sizes map to real jobs:
| Envelope | Size | Best for | Contents |
|---|---|---|---|
| #10 Regular | 4-1/8" x 9-1/2" | Letters, invoices, direct mail | 8-1/2" x 11" folded in thirds |
| #10 Window | 4-1/8" x 9-1/2" | Billing, statements, payroll | Same, with address shown through window |
| #9 Regular | 3-7/8" x 8-7/8" | Reply and remittance mail | Fits inside a #10 |
| #6-3/4 Regular | 3-5/8" x 6-1/2" | Notes, cards, small checks | Half-sheet or quarter-fold documents |
| 6 x 9 Booklet | 6" x 9" | Catalogs, reports, proposals | Documents up to 5-3/4" x 8-3/4" flat |
A common mistake is ordering the outer envelope before deciding whether you need a reply envelope. For billing or fundraising, the #9 nests inside a #10, plan both at once and you avoid a second print run.
For a deeper breakdown of matching formats to documents, our guide on choosing professional business envelopes walks through size, type, and window options in more detail.
When you're ready to see the actual formats, you can shop business envelopes in #6-3/4, #9, #10 Regular, and #10 Window styles, in stock and ready to ship.
Choosing an Envelope Design Template or Starting From a Blank Canvas
Every envelope design starts one of two ways: from a template supplied by your printer, or from a blank canvas you build yourself. Templates are faster and safer; a blank canvas gives full control but puts the burden of correct dimensions on you.
- The trim size (the finished envelope dimensions)
- The flap outline and the fold line where the flap creases
- The side and bottom seam areas, which cannot carry live artwork
- The window opening position and size, if the format has a window
- The bleed area extending beyond the trim
- The safe margin inside the trim where text and logos must stay
- A separate dieline layer, clearly labeled, that the printer can toggle on and off
If you're starting from a blank canvas, set the document to the exact envelope trim size, not the press sheet, and add bleed and safe margins before placing a single element. Add bleed on all four sides per the printer's specification, typically an eighth of an inch beyond trim, and confirm the exact figure with your printer. Treat everything outside the safe margin as expendable.
Whichever route you take, the workflow is the same:
- Set the document to the exact envelope trim size
- Add bleed and mark your safe margin
- Place the return address block first, since it anchors the layout
- Position the recipient address block within the safe area
- Add logo and brand elements last
- Export a print-ready file and request a proof
Watch out: designing on the flap side by mistake is a quiet, expensive error. The flap is where the envelope is folded and glued, and artwork placed there will be creased, hidden, or destroyed in production. Confirm which face of the template is the front before you place anything.
Custom Business Envelopes With Logo: Branding That Gets Noticed
Custom business envelopes with logo placement can make a strong brand impression. Every piece of mail carries your name into someone's hands, and a plain white envelope wastes that moment.
Branding an envelope comes down to four elements: the logo, your brand colors, your typography, and your return address. Get those consistent and the envelope reads as intentional before anyone opens it.
Logo placement follows a simple rule: front, upper left, aligned with the return address block, and kept modest.
Typeface choice matters more than most people expect. A clean sans-serif holds up at small sizes; a delicate script with thin strokes can fill in or break up.
For window envelopes, printing a logo correctly around the window takes a little more care. Our step-by-step guide to printing logos on window envelopes covers template setup through test print so your branding lands cleanly on every batch.
Business Envelope Layout: Return Address, Recipient Address, and Logo Placement
Business envelope layout is governed by two masters: how the mail piece must be addressed to move through the postal system, and how the design should read to the person holding it. The postal rules come first. A beautiful envelope that the sorting equipment can't read is a returned envelope.
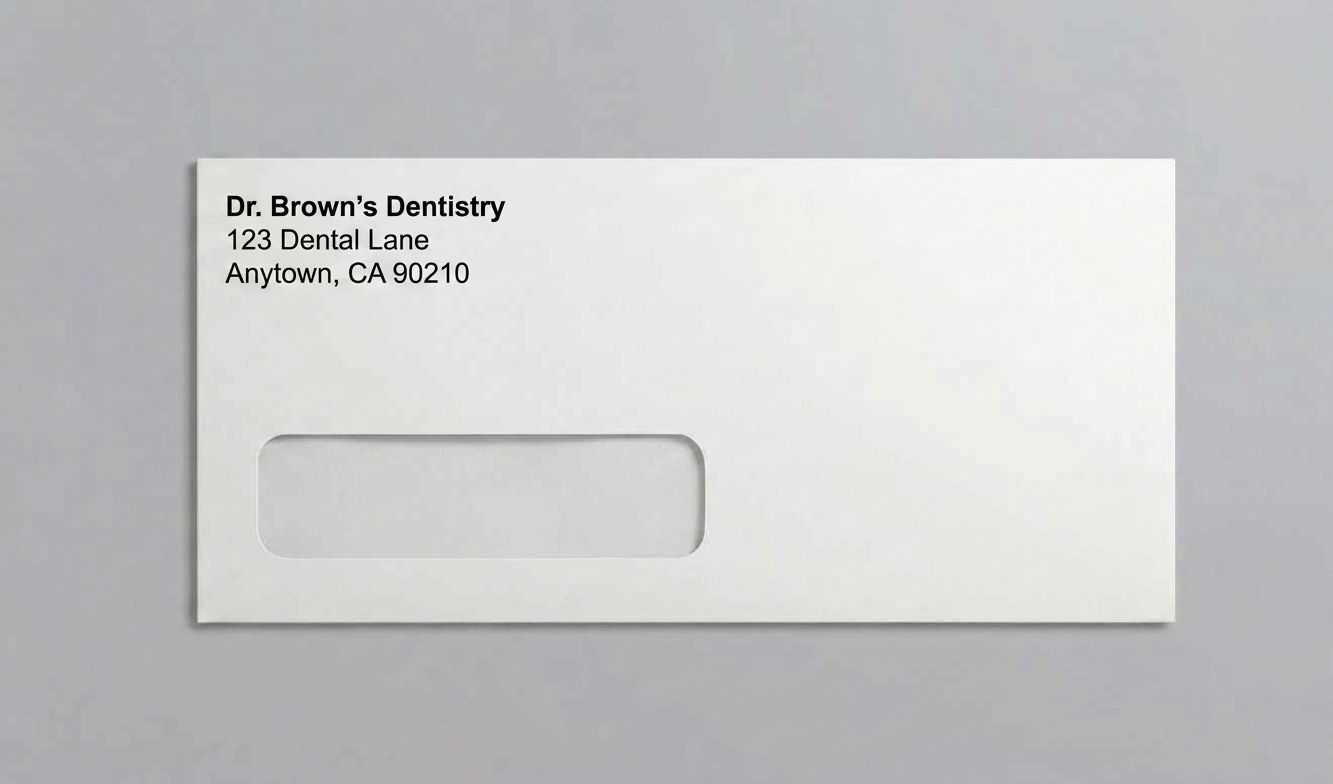
The recipient address occupies the center of the envelope face, and it needs to stay clear of everything else. Keep the address block free of graphics, borders, and background color.
The return address sits in the upper left corner, typically in a smaller point size than the recipient block. Your logo can sit above or beside it.
Three layout rules that prevent most problems:
- Keep the recipient address block within the safe margin, never near the trim edge
- Maintain strong contrast between the address text and the envelope paper
- Avoid placing any element where the postage indicia will print
That last point catches people. Design a full-bleed graphic across the top right and you'll find it covered by a stamp or meter mark.
Legibility deserves its own mention. Address text should be large enough to read at arm's length and set in a plain typeface. Decorative fonts slow down machines and mail carriers, and slowed mail is delayed mail.
Envelope Printing Specifications: Paper Stock, Finish, and Print-Ready Files
Envelope printing specifications are where good design either survives production or falls apart. Three things decide the outcome: the paper stock, the finish, and whether your file is genuinely print-ready.
The specifics matter more than the checklist:
- Trim size: the document is set to the exact finished envelope dimensions, not the press sheet.
- Bleed: artwork that reaches the edge extends beyond trim by the amount your printer specifies. Elements that stop exactly at trim can show a thin white sliver after cutting.
- Safe margin: all live text and logos sit inside the safe area, clear of trim, seams, and the flap fold.
- Resolution: raster images are placed at a resolution appropriate for print, typically 300 ppi at final size. An image that looks sharp on screen at 72 ppi will look soft on paper.
- Color mode: files are built in the color mode the printer requires for the chosen printing method. Confirm this before you convert anything, because converting late can shift brand colors.
- Fonts: all fonts are embedded or converted to outlines so the printer's system doesn't substitute a different typeface.
- Dieline: the dieline layer is included and clearly labeled, separate from the artwork layer.
- File format: the file is exported in the format the printer accepts, with layers preserved if requested.
Window Envelopes, Security Features, and Postal Compliance
Window envelopes and security features solve two different problems, and both are worth understanding before you commit to a format.
A window envelope displays the recipient address printed on the document inside, eliminating address labels and speeding up high-volume mailing. The #10 Window Envelope uses a clear poly window, left-positioned, and is built for invoices, billing statements, payroll, and financial correspondence. The critical detail is positioning: the address on your document must land precisely inside the window when the sheet is folded in thirds. Test with a mock-up before printing thousands.
The #10 Window Envelope and other products in our range use a gummed flap closure.
Check the current postal service guidance on letter-size mail and automation before finalizing, since requirements are updated periodically and a design that passed last year may need adjustment.
If you're mailing invoices or statements at volume, the #10 window envelope is the format built for that job, available in pack sizes from small office quantities to high-volume billing runs.
Order Your Custom Envelopes From Atlantic Envelope
Design decisions only pay off when the envelopes actually arrive, on time, and look the way you approved. That's the part of the process we've handled since 1982.
Atlantic Envelope is a family-owned and operated supplier, serving home-based professionals and government administrative staff, as well as offices and event planners.
What you get: a wide range of products from standard business and window envelopes to custom manufactured specialties, competitive pricing, and fast, reliable shipping.
Here's the challenge: most businesses send mail every day and never give the envelope a second thought. That's a brand impression going out the door blank.
Get started with Atlantic Envelope and put your logo on every piece of mail your business sends. Browse the range or contact us with questions about sizes, quantities, or custom work.
Your envelopes are the one piece of marketing every recipient physically touches. Design them with the same care you'd give a landing page, and they'll do quiet work for your brand on every mailing.
Frequently Asked Questions
Where should a logo go on a mailing envelope?
Place your logo in the top-left corner, above the return address, so it is the first element the recipient sees. Keep it at least 1/4 inch from the top and left edges to avoid being trimmed during printing. For window envelopes, position the logo on the opposite side of the window to keep the layout balanced. A logo sized between 1 and 1.5 inches wide works well on a standard #10 envelope.
How do I format a return address on an envelope?
Print the return address in the top-left corner, using a font size no smaller than 8 points for legibility. Include your business name, street address, city, state, and ZIP code on separate lines. Leave at least 1/4 inch of space from the top and left edges. For bulk mailings, the return address helps with undeliverable mail and gives the envelope a professional, branded appearance.
Can I use a template to design a custom business envelope?
Yes, templates are the fastest way to set up a print-ready envelope. Most envelope suppliers provide templates with the correct dimensions, bleed, and safe margins for each size, including #10, #9, and booklet styles. Open the template in your design software, place your logo and text inside the safe area, and export as a high-resolution PDF. Templates reduce the risk of artwork being cut off during printing.
What envelope printing specifications should I check before uploading artwork?
Confirm the bleed (usually 1/8 inch beyond the trim line), safe margins (at least 1/4 inch inside the trim), color mode (CMYK for full-color printing), and resolution (300 DPI). Convert all fonts to outlines or embed them, and save as a print-ready PDF. Also check that the artwork does not overlap the window area on window envelopes.
What size envelope should I use for business mail?
The #10 envelope (4-1/8 x 9-1/2 inches) is the standard for invoices, letters, and statements because it fits an 8-1/2 x 11 inch sheet folded in thirds. For reply mail, use a #9 envelope that fits inside a #10. For catalogs or unfolded documents, choose a 6 x 9 booklet envelope. Match the size to your contents and mailing purpose to avoid extra postage or folded inserts.
